Build a counter with useState in React!


A Quick Recap of useState
useState enables you to efficiently build functional components which utilise state, moving away from class based components and 'this.state' land.
To understand the useState hook, let's first look at a simple class component:
import React from "react"
class App extends React.Component {
constructor() {
super()
this.state = {
answer: "Yes"
}
}
render() {
return (
<div>
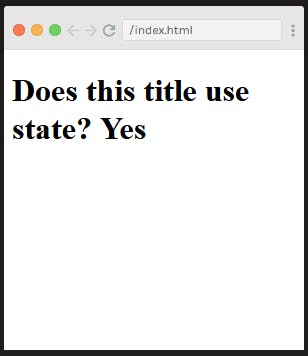
<h1>Does this title use state? {this.state.answer}</h1>
</div>
)
}
}
export default App
This will output "yes" according to the value of our answer property within state:
Now let's see what it's like to change this class component into a functional component using the useState hook.
First, the useState function comes from the React library, so we can hold that in as a named import:
import React, { useState } from "react"
Here's a functional component we can build:
import React, { useState } from "react"
function App() {
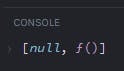
const value = useState()
console.log(value)
return (
<div>
<h1>Does this title use state? Yes</h1>
</div>
)
}
Console logging value, the variable we've assigned the useState function to, will give us an array where the first valuation is null and the section valuation is an empty function f().
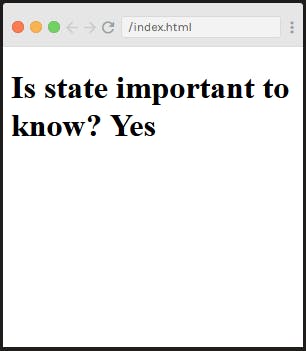
Whatever we put inside the useState function will become the initial value of state. This essentially mimics this.state in a class based component. We can therefore insert value[0] to refer to the first index of the useState array into our h1 title like this:
import React, { useState } from "react"
function App() {
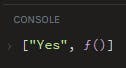
const value = useState("Yes")
console.log(value)
return (
<div>
<h1>Does this title use state? {value[0]}</h1>
</div>
)
}
Giving us an output of
and console logging
We can clean this up using a little array destructuring :
import React, { useState } from "react"

function App() {
    const [ value ]= useState("Yes")
    console.log(value)

    return (
        <div>
            <h1>Does this title use state? {value}</h1>
        </div>
    )
}
And there you have it! A simple component returning a useState value.
Changing State using useState
To change state before hooks were introduced, we needed class based components so we could use this.setState. As shown earlier, when using the useState hook we receive our very own function we can provide a value for to change state.
Building Our Counter
Here I've used an onClick event handler which uses the function setValue, which itself calls prevValue and increments it by 1:
import React, { useState } from "react"

function App() {
    const [ value, setValue ]= useState("0")

    return (
        <div>
            <h1>{count}</h1>
            <button onClick=() => setValue(prevValue => prevValue + 1)}>Change!</button>
        </div>
    )
}

This code could be more readable, so we can take the function apart, I've also relabelled the array variables to count and setCount:
function App() {
    const [count, setCount] = useState(0)

    function increment() {
        setCount(prevCount => prevCount + 1)
    }

    return (
        <div>
            <h1>{count}</h1>
            <button onClick={increment}>Increment</button>
        </div>
    )
}

export default App
And that's our useState counter done! Let's add some more functionality to it using the same principles as above:
function App() {
    const [count, setCount] = useState(0)

    function increment() {
        setCount(prevCount => prevCount + 1)
    }

    function decrement() {
        setCount(prevCount => prevCount - 1)
    }

    function double() {
        setCount(prevCount => prevCount*2)
    }

    function halve() {
        setCount(prevCount => Math.round(prevCount/2))
    }


    return (
        <div>
            <h1>{count}</h1>
            <button onClick={increment}>Increment</button>
            <button onClick={decrement}>Decrement</button>
            <button onClick={double}>Double</button>
            <button onClick={halve}>Halve</button>
        </div>
    )
}

export default App
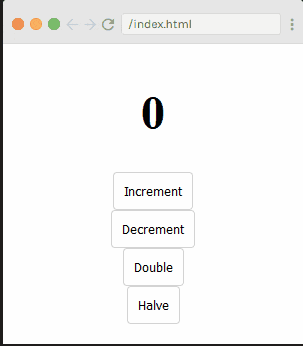
Now we have a finished counter that can increment, decrement, double and halve the previous count value.
Thanks for reading! Could you think of any more functionality to the counter? I'd love to see your creations :)